How to remove image backgrounds and refine transparent PNGs
A useful cut-out starts with a suitable photo and ends with an inspection of the edges. The output format decides whether the background stays transparent.
By Abdul BasitPublished Updated 4 min read
In short
- The background remover outputs a transparent PNG.
- Use erase and restore to correct missing details or leftover background.
- Convert the transparent PNG to JPG here for a white background.
- An edited portrait is not a certified passport photo.
A product image needs to fit a shop layout, a portrait needs a quieter background, or a presentation needs a subject without a white rectangle. A genuinely transparent file helps with each.
Use your own images or files you have permission to edit and use. These tools do not supply stock photos, branded logos or ready-made backdrops.
Start with a clear subject
Sharp focus and a clear difference between subject and background make separation easier. Motion blur, backlighting and similar colours can cause missing details or unwanted areas.
For portraits, inspect hair, ears, glasses and shoulders. For products, check thin handles, cables, transparent materials and reflections. A better original may help more than repeatedly processing a difficult photo.
Remove the background locally
- Open Remove background and select your image.
- Start processing. The required model downloads on first use; the image is processed locally.
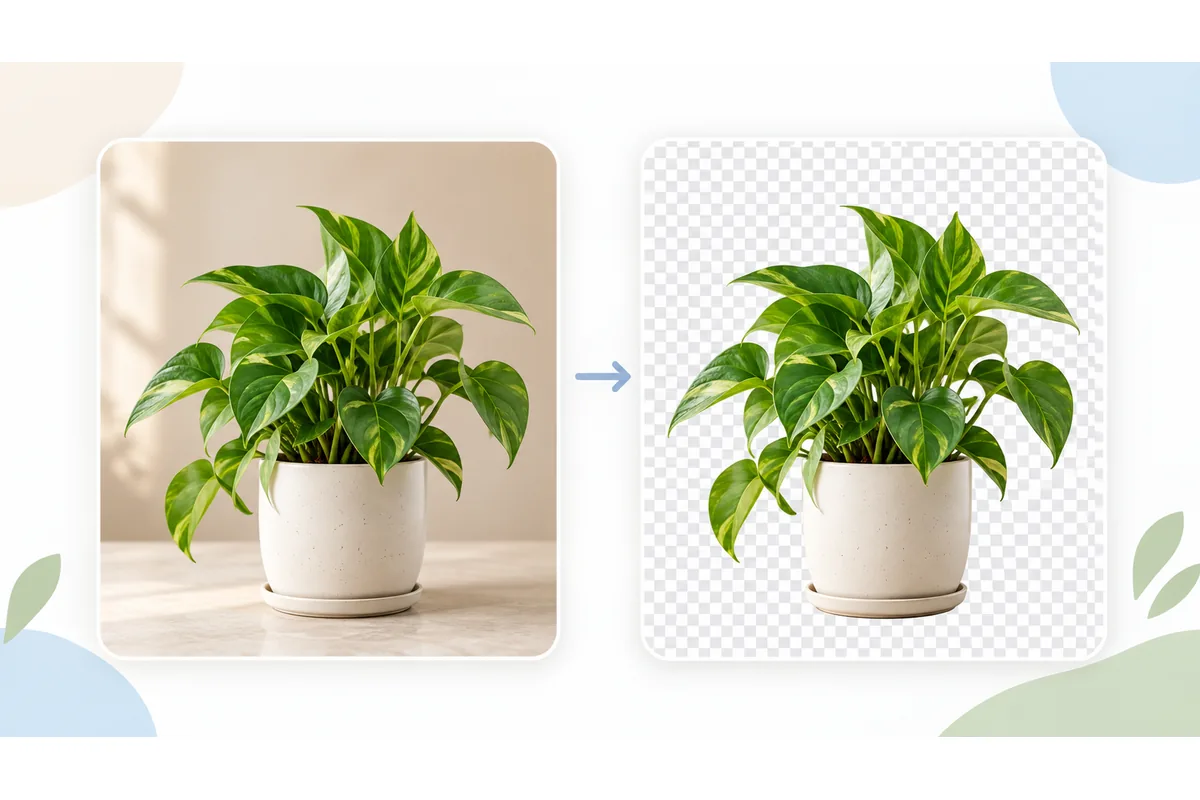
- Inspect the cut-out against the checkerboard preview.
- Check fine edges at a useful viewing size.
- Download the PNG and keep the original.
Use Erase for unwanted background and Restore for parts of the subject removed by mistake. Zoom in, reduce the brush size for fine edges and apply the edits before downloading. Restore reveals pixels from the original, so it may also bring back nearby background; it does not reconstruct hidden detail.
Transparency is different from white
A transparent pixel lets the future background show through; a white pixel remains white. A checkerboard commonly represents transparency, but a checkerboard painted into the file will remain visible.
| Desired result | Next step |
|---|---|
| Subject on changing backgrounds | Keep the transparent PNG |
| Subject on white | Convert the PNG to JPG |
| Subject over another photograph | Composite the PNG in an image editor |
| Circular profile image | Use a round crop with transparent corners |
PNG to JPG fills transparent areas with white here. It does not remove a background from an opaque image. Use Circle crop for a round image.
White and dark preview backgrounds only help you inspect the cut-out; they are not included in the downloaded PNG. Check both to find bright halos or missing dark edges.
Portraits and application photos
Keep skin tones and hair natural and leave enough room around the subject. Background editing alone cannot turn an unsuitable snapshot into a suitable professional portrait.
Use Resize image for the required dimensions and Compress for online forms for an upload limit. Follow the recipient’s rules and avoid edits that misrepresent the person.
For an identity-document photo, check the receiving authority’s current requirements for background, pose and permitted editing. Removing the background does not certify that a photo is acceptable.
Product details come before smaller files
Packaging text, surface texture and signs of wear should remain visible. Inspect the cut-out before reducing file size. Then prepare a copy for the intended upload.
The Amazon, Shopify and eBay presets are editable starting points, not acceptance guarantees. The compression guide explains how to balance size and detail.
Animations and work in other applications
Animated files use the separate GIF background remover, which processes up to 60 frames. GIF does not support PNG-style soft semitransparent edges, so contours can appear harsher.
Only the first 60 GIF frames are processed; later frames can be omitted. Play the saved animation to check length and flicker. Applying a brush to all frames repeats the same coordinates, without tracking a moving subject. Edit individual frames when the subject changes position.
Insert the resulting PNG in PowerPoint or an image editor as needed. QuickImageFix does not control those programs and does not provide video cut-outs, background blur or automatic background replacement.
For format and alpha-channel choices, see the image format guide.
Frequently asked questions
- Why is there a white fringe around the subject?
- Original background pixels can remain along the contour. Use a small erase brush and compare against a dark preview; use restore if you remove part of the subject. PNG-to-JPG conversion does not repair a halo.
- Can I replace the portrait background with anything I want?
- This tool removes the background and returns PNG. Use an editor for a different photograph or an arbitrary colour. You can obtain white here by converting the transparent PNG to JPG.
- Will a transparent PNG work in PowerPoint?
- Yes, if it contains real transparency. A checkerboard or white area that is part of the image pixels remains visible when you insert it.
- Are my portraits uploaded?
- The selected image is processed on your device. The browser downloads the model data, but the background-removal tool does not upload the photo for server processing.
- Why does background removal take longer the first time?
- The browser downloads and prepares the AI model on first use. A cached model can shorten later starts, but processing time still depends on your device and image. Keep the page open until it finishes.
About the author
Abdul Basit
Abdul Basit runs QuickImageFix and writes its guides to image compression, resizing, format conversion and PDF tasks. The guides explain the tools available on this site and the choices that affect your results.
Read the author profile